Image Size Manager
The image size manager is a tool that allows you to view all of the defined image sizes in your WordPress application, as well as to create new ones. In addition to this, if Imgix is enabled, you can apply dynamic image parameters to specific sizes. For example, if you wanted the hero image on your posts page to be a blurred monochrome, you can use the Image Size Manager to easily do this.
The Image Sizes Grid
This grid displays all of the defined image sizes and the attributes of that size. For WordPress and Theme sizes you can only view information about the size and (if Imgix or Dynamic Images is enabled) edit the filter parameters for that size. You can’t delete or change any of their properties.

Type
This shows you where this image size is being defined.
- WordPress – This is a system defined size
- Theme – This is being defined in the theme
- Custom – This size was defined with this Image Size Manager tool
Title
The title of the size
Size
The idenfier for the size.
Width/Height
The dimensions for the size.
Crop
If the size is cropped or fit to size.
Crop {#crop} Axis
This control where the crop center point is.
Actions
The trash icon will delete the size. The gear icon will allow you to adjust filter parameters for that size.
Adding a New Image Size
You may want to define a new image size for embedding into posts or for use with Guttenberg. To add a new image size, click on the Add New Image Sizebutton in the top right corner. In the pop up dialog, set the properties of the size and click on Create Image Size.
Image Size Filter Parameters
In the example we mentioned above, we’d like to make the hero image for our post page always be monochrome and slightly blurred. Without Imgix, we’d need to do this kind of image treatment before uploading to WordPress using Photoshop or similar. The problem with this should be fairly apparent, but to enumerate:
- You have to do this image treatment in Photoshop for every post.
- Changing the image treatment six months down the road when your site’s design is updated will require significant effort to redo all of the images for all of the posts.
- The “recipe” of Photoshop edits will have to be noted and shared with any other people contributing posts to the site.
- Changing the size of the hero image will require you to redo all of the previous images if that size change is significant.
By using Imgix and the Image Size Manager, we can create these image treatments in a non-destructive manner that can be changed or removed on a whim. Another example, possible more practical, is adding a watermark to specific image sizes. Again, normally you’d have to do this before uploading anything to WordPress and if your logo changed or you wanted to try a different position out, you’d have the same problems enumerated above.
Editing Image Size Filter Parameters
To edit the filter parameters for an image size, click on the gear icon next to the size. An alert will pop up to notify you that you have to select an image to use as a sample image for editing. Once you’ve selected the sample image, the Image Editor will appear.
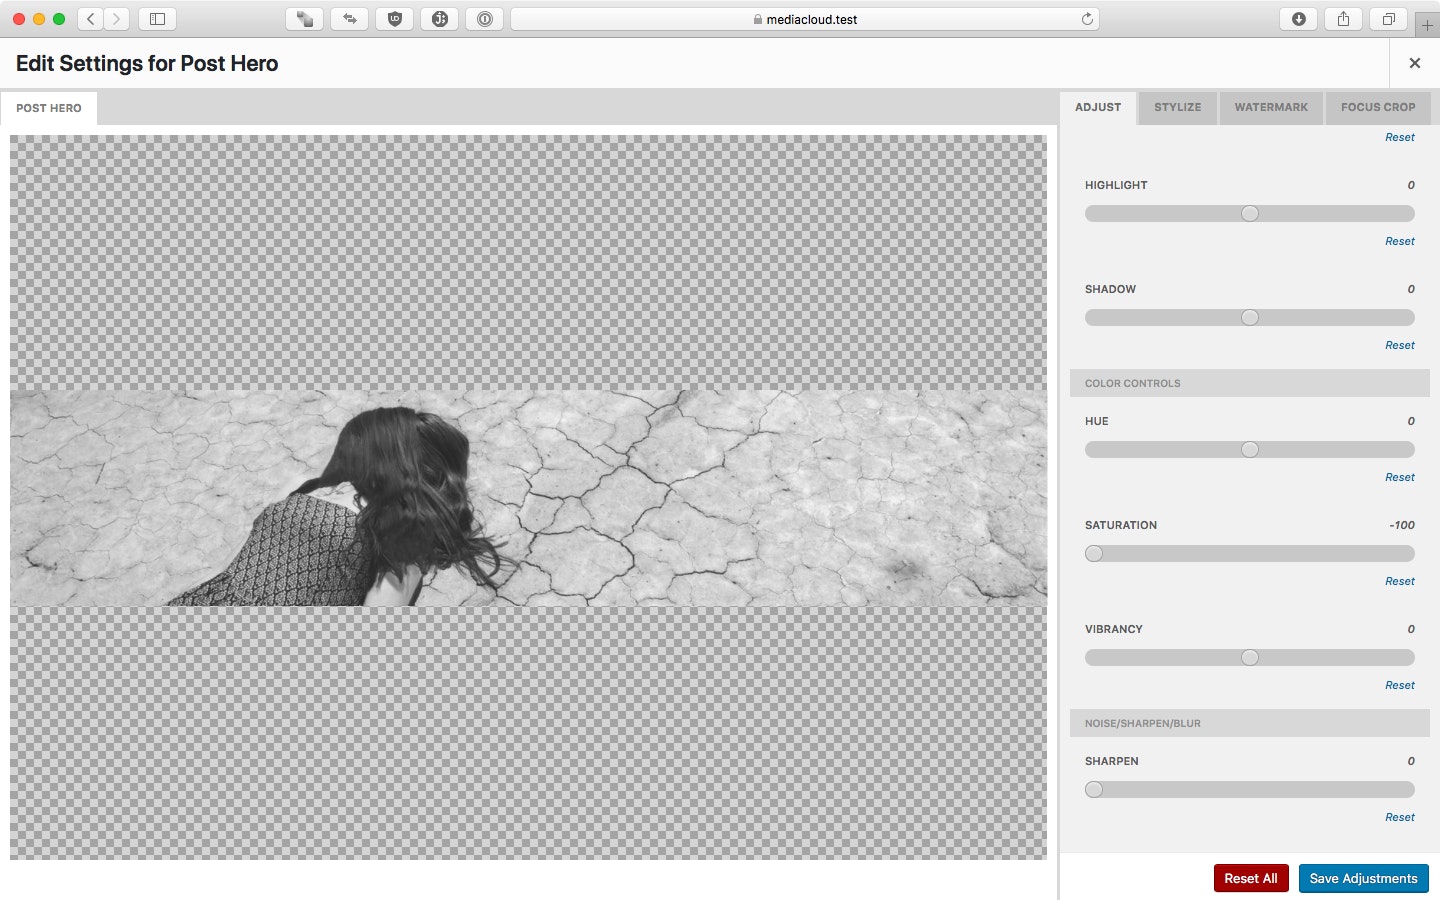
Consult the Image Editor documentation for more help with regards to actual image editing. Once you’ve made the edits you want, click on Save Adjustments to save those parameters. Click on the close button in the upper right of the image editor to close the editor. Now that you’ve saved these adjustments, any time any image is displayed on the front end of your site using that specific size, those filter parameters will be applied to it.