Setting Up Backblaze
Even though we support Backblaze, it’s really recommended that you consider a different cloud storage provider. Backblaze is really only good for archival and lacks the features necessary for things like pre-signed URLs (important for WooCommerce or Easy Digital Downloads), direct uploads, etc. Additionally, in our testing, Backblaze is consistently has the worst performance in terms of upload and download speeds. Caveat emptor.
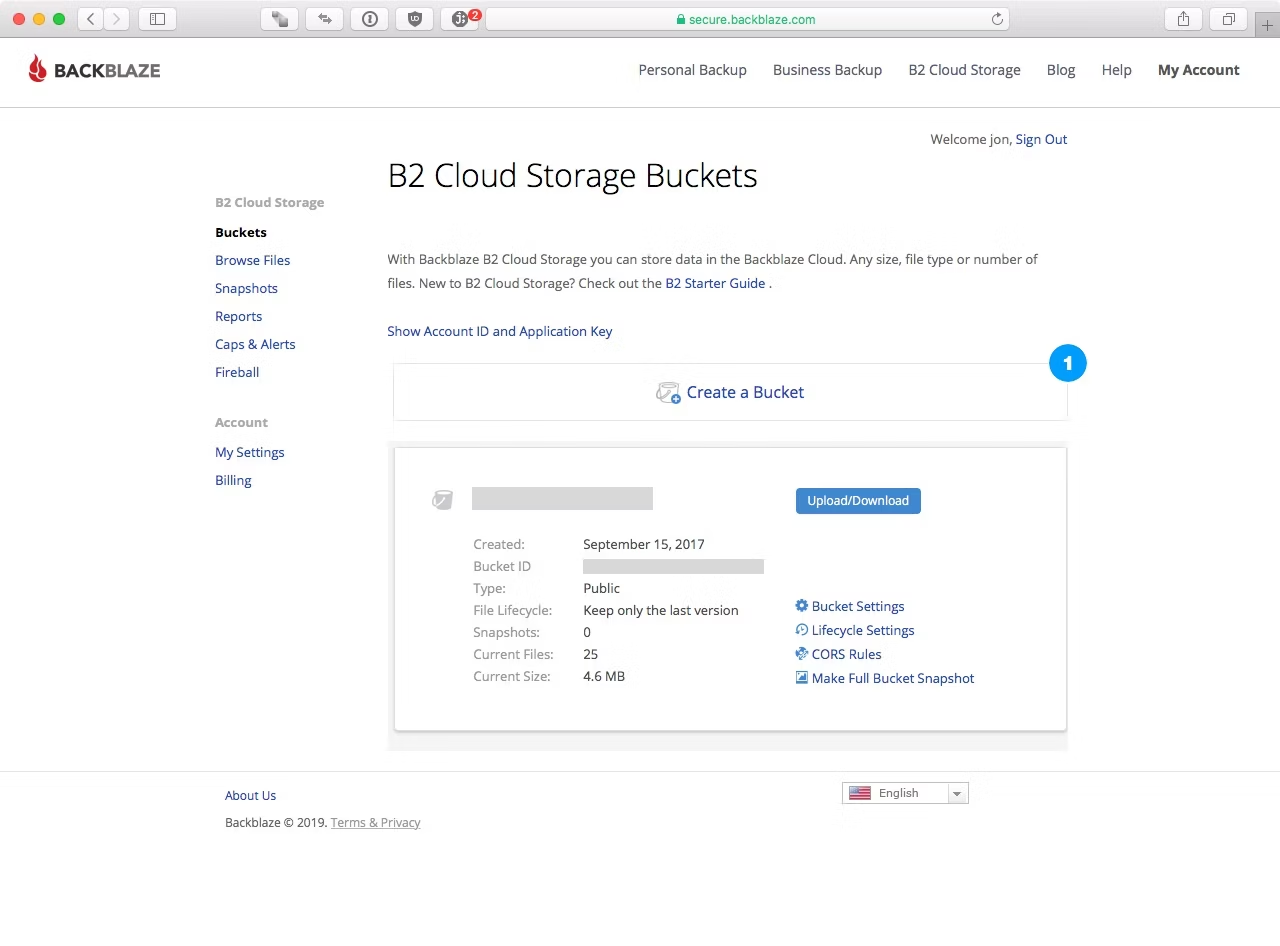
Step 1 – Create Bucket
To get started, log into your Backblaze account and click on the Bucketssection. When the page had loaded, click on Create a Bucket.
Step 1.1 – Bucket Properties
In the pop-up dialog, give your bucket a name and make sure Files in Bucket is set to Public. If Files in Bucket is set to Private, it will not work.
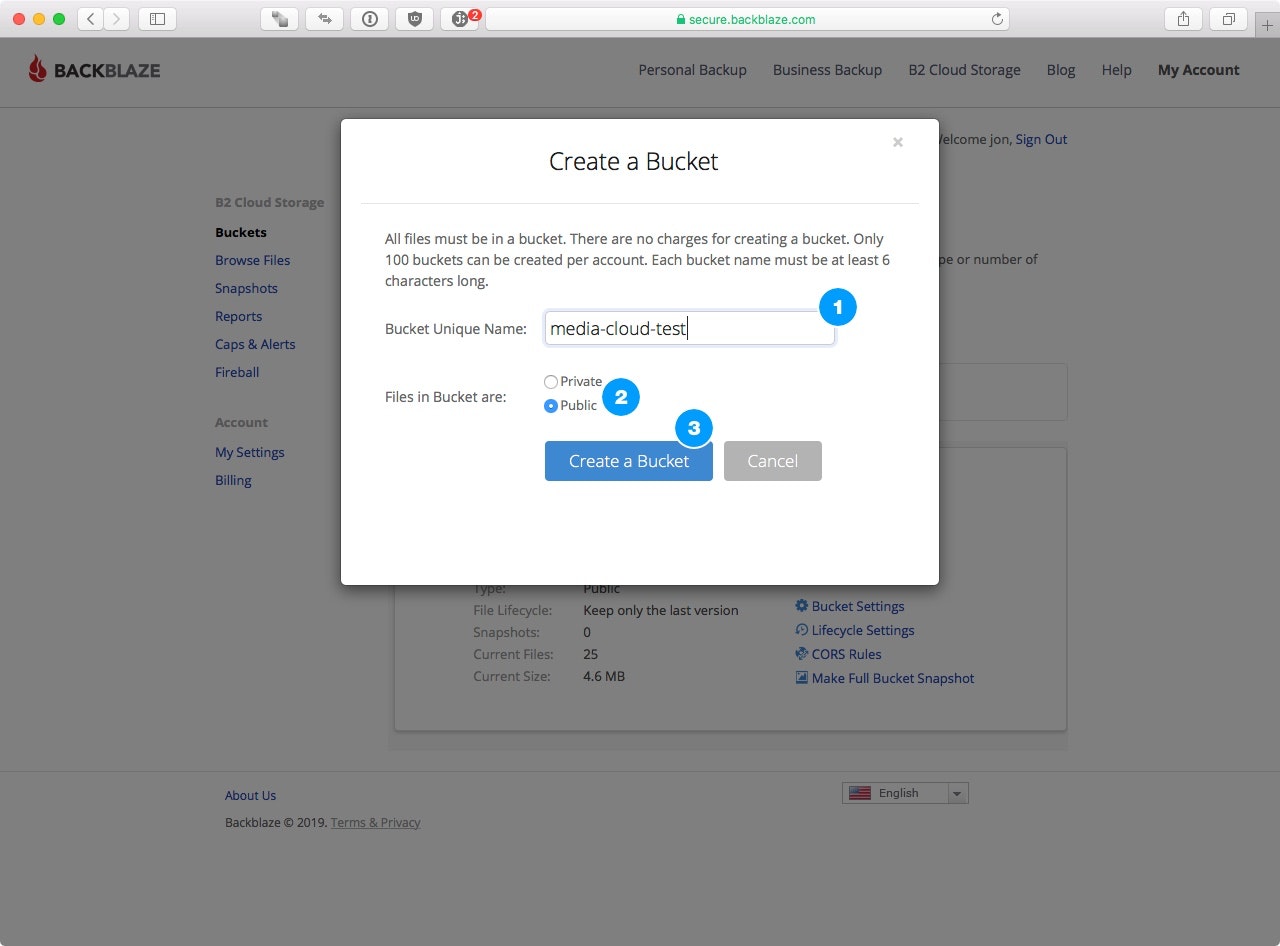
Finally, click on Create a Bucket
Step 2 – Create Application Key
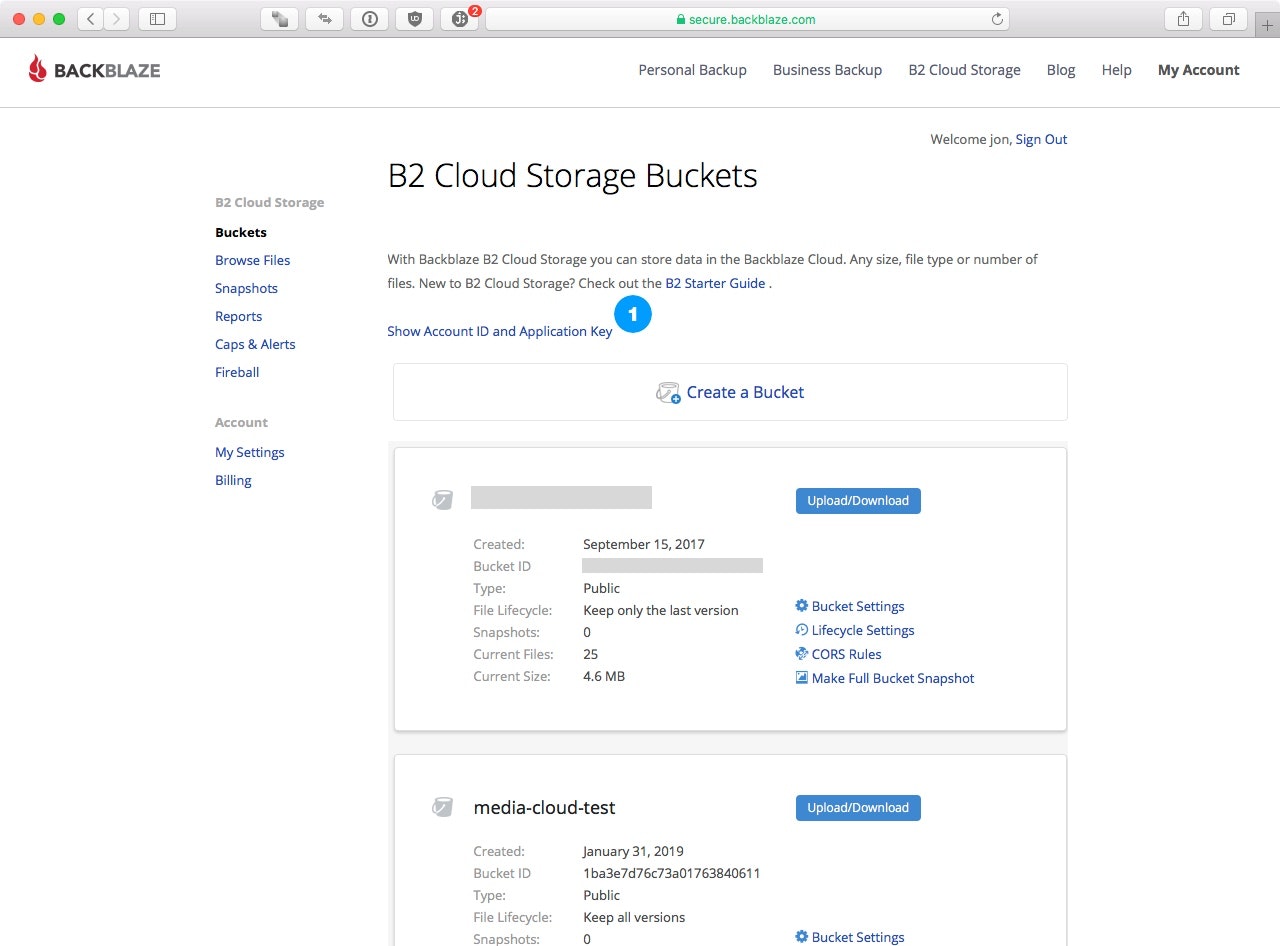
After the bucket has been created, click on the Show Account ID and Application Key.
Step 2.1 – Key Properties
In the dialog that appears, set the following values:
- Give the key a name
- Set Allow acces to bucket(s) to All. Due to the Backblaze PHP library being used, this must be set to All.
- For Type of Access set this to Read and Write
- DO NOT set a File name prefix
- Leave Duration blank
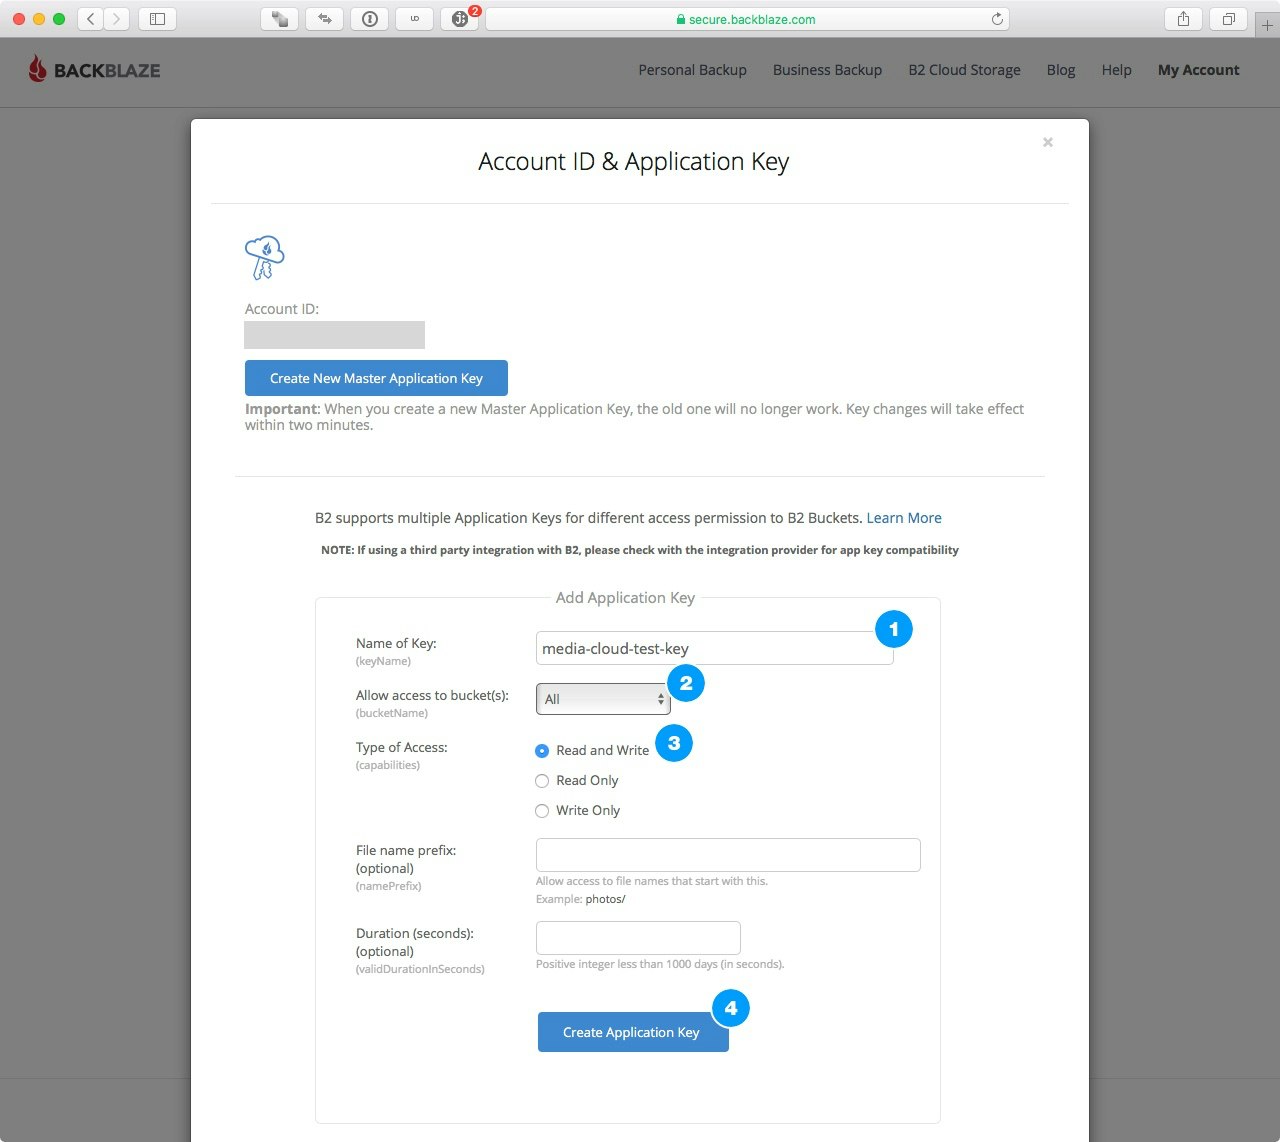
When finished, click on Create Application Key.
Step 2.2 – Copy Key ID and Key
Once you click on Create Application Key a little blue box will appear underneath the key’s settings. You may need to scroll to see it.
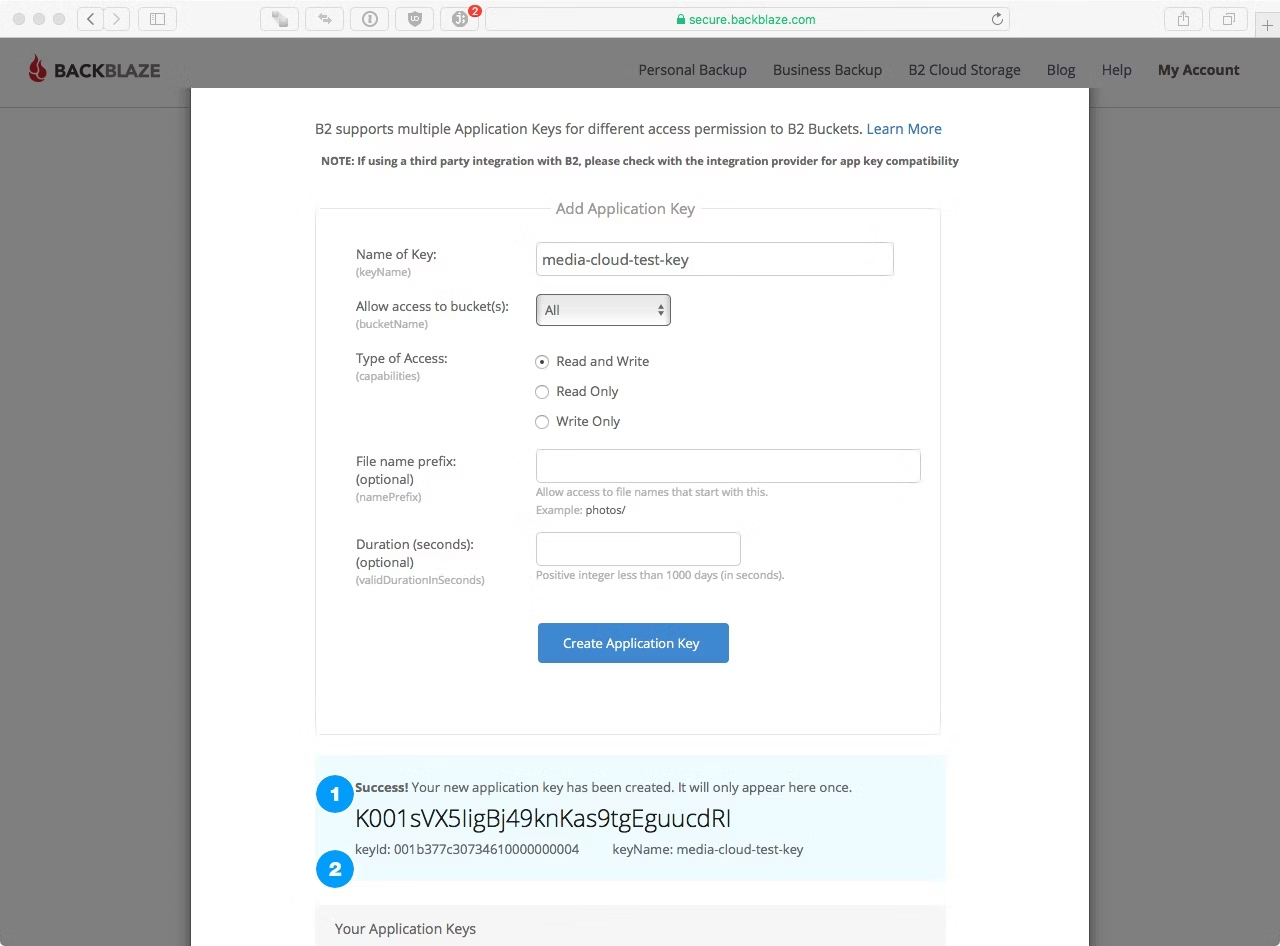
Copy the key and the keyId values.
Step 3 – Configure Media Cloud
Now that everything has been set up, it’s time to set up Media Cloud. Navigate to Settings in the Media Cloud admin menu and select Cloud Storage.
Step 3.1 – Provider Settings
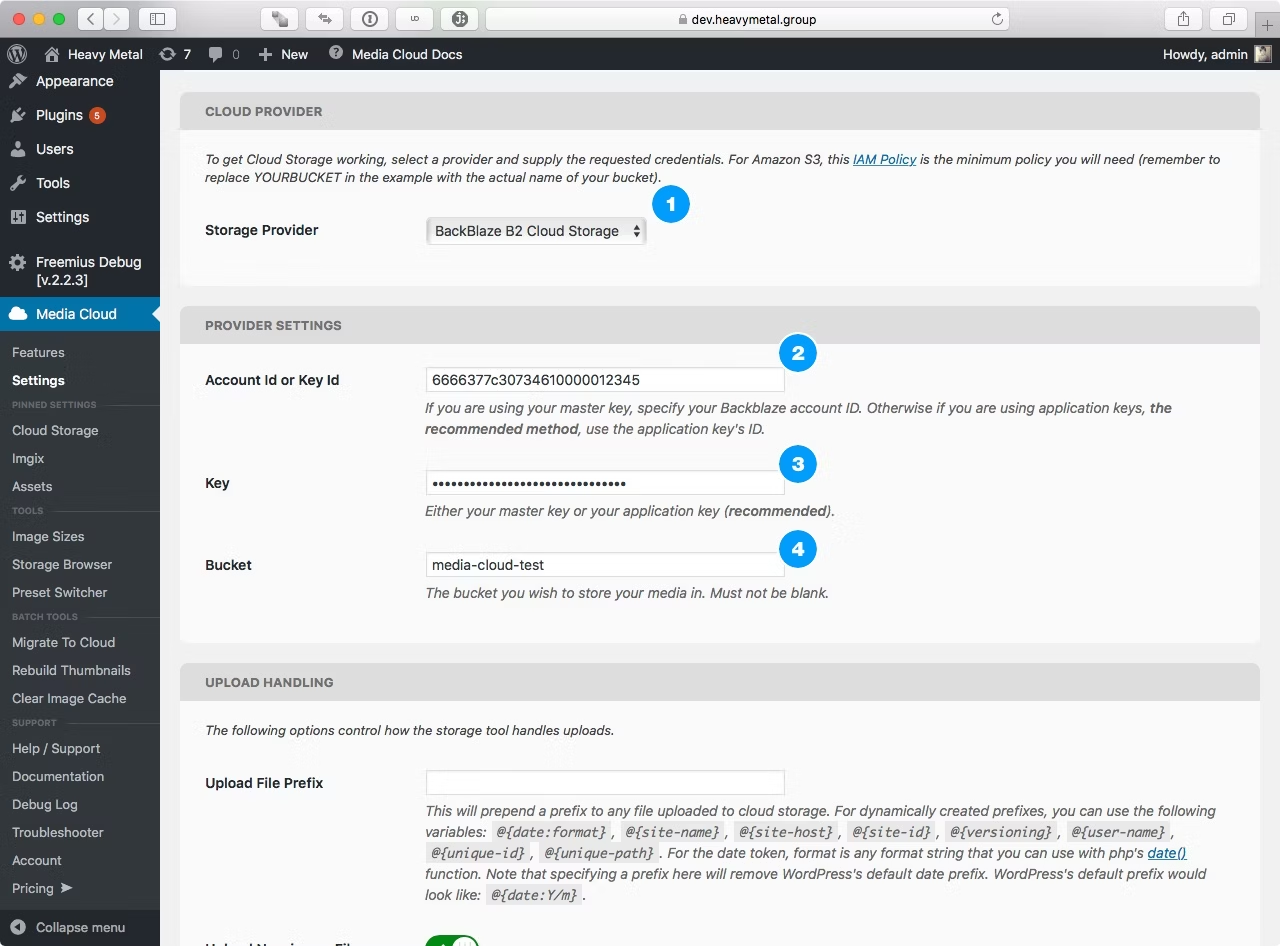
In the Provider panel, set the Storage Provider to Backblaze B2 Cloud Storage. – In Account Id or Key Id enter the key id value we generated in Step 2.2
- In Key enter the key we generated in Step 2.2
- For Bucket enter the name of the bucket
At this point, these are the basic settings you need to get DigitalOcean Spaces working with Media Cloud. Save the settings and run the System Compatibility to verify that everything is working correctly.