Setting Up Wasabi
Step 1. Create IAM User
The first thing we need to do when setting up Wasabi is to create a set of credentials that Media Cloud can use to access Wasabi.
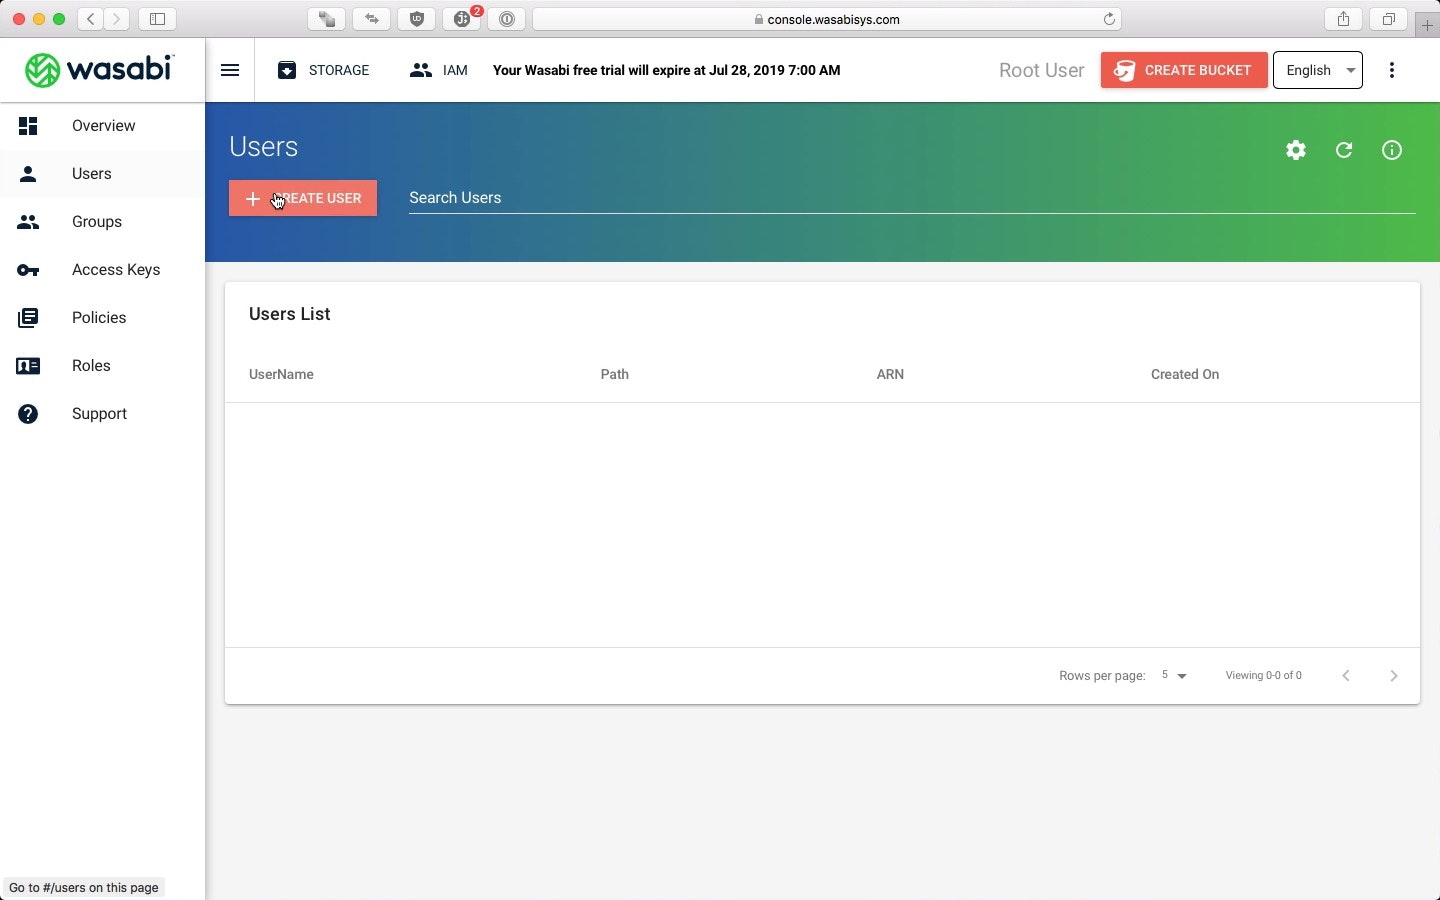
Step 1.1 Create User
Navigate to the IAM section of the Wasabi console. Click on Users in the left hand navigation and then click on Create User.
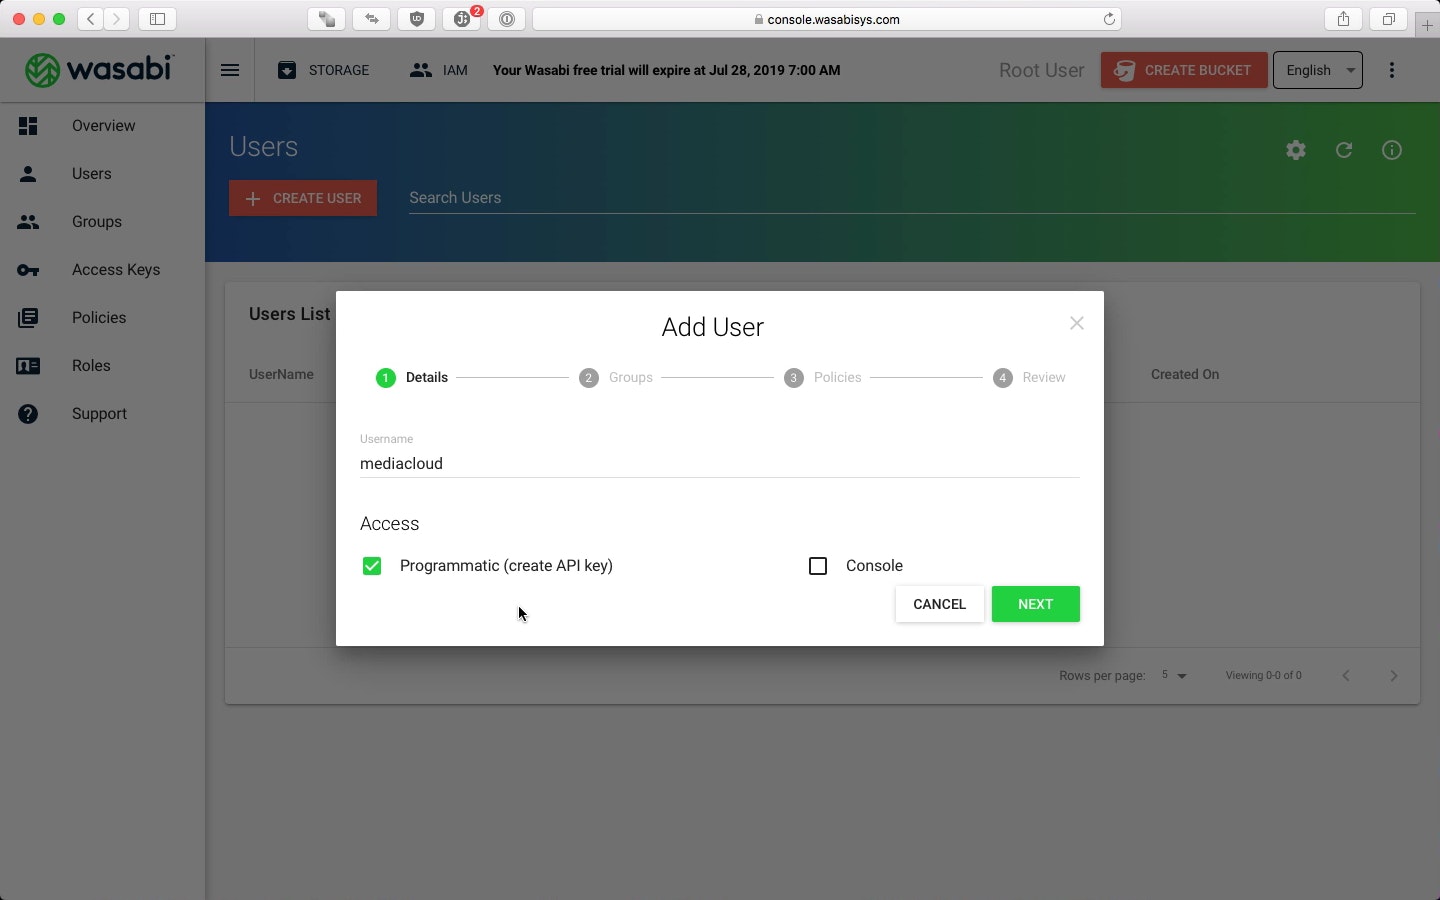
Step 1.2 User Name and Access
In the Add User pop up, set the user name to anything you like and make sure that the Programmatic (create API key) option is checked.
Click Next and on the Groups section click Next again.
Step 1.3 Policies
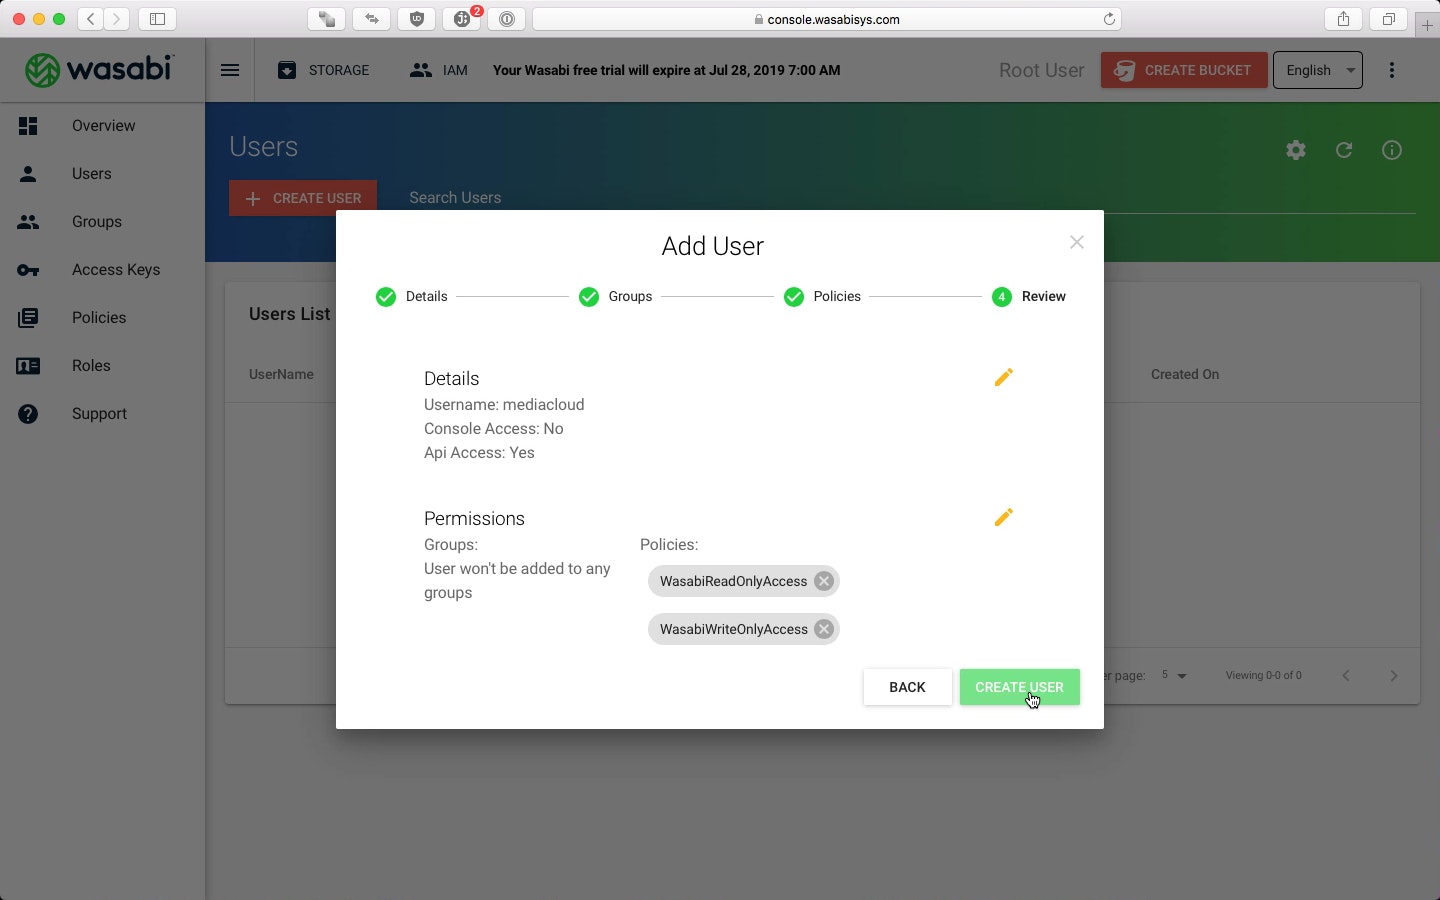
In this section of Add User make sure to select WasabiReadOnlyAccess and WasabiWriteOnlyAccess by clicking on the + sign. Click on Next when you’ve done this.

Step 1.4 Review
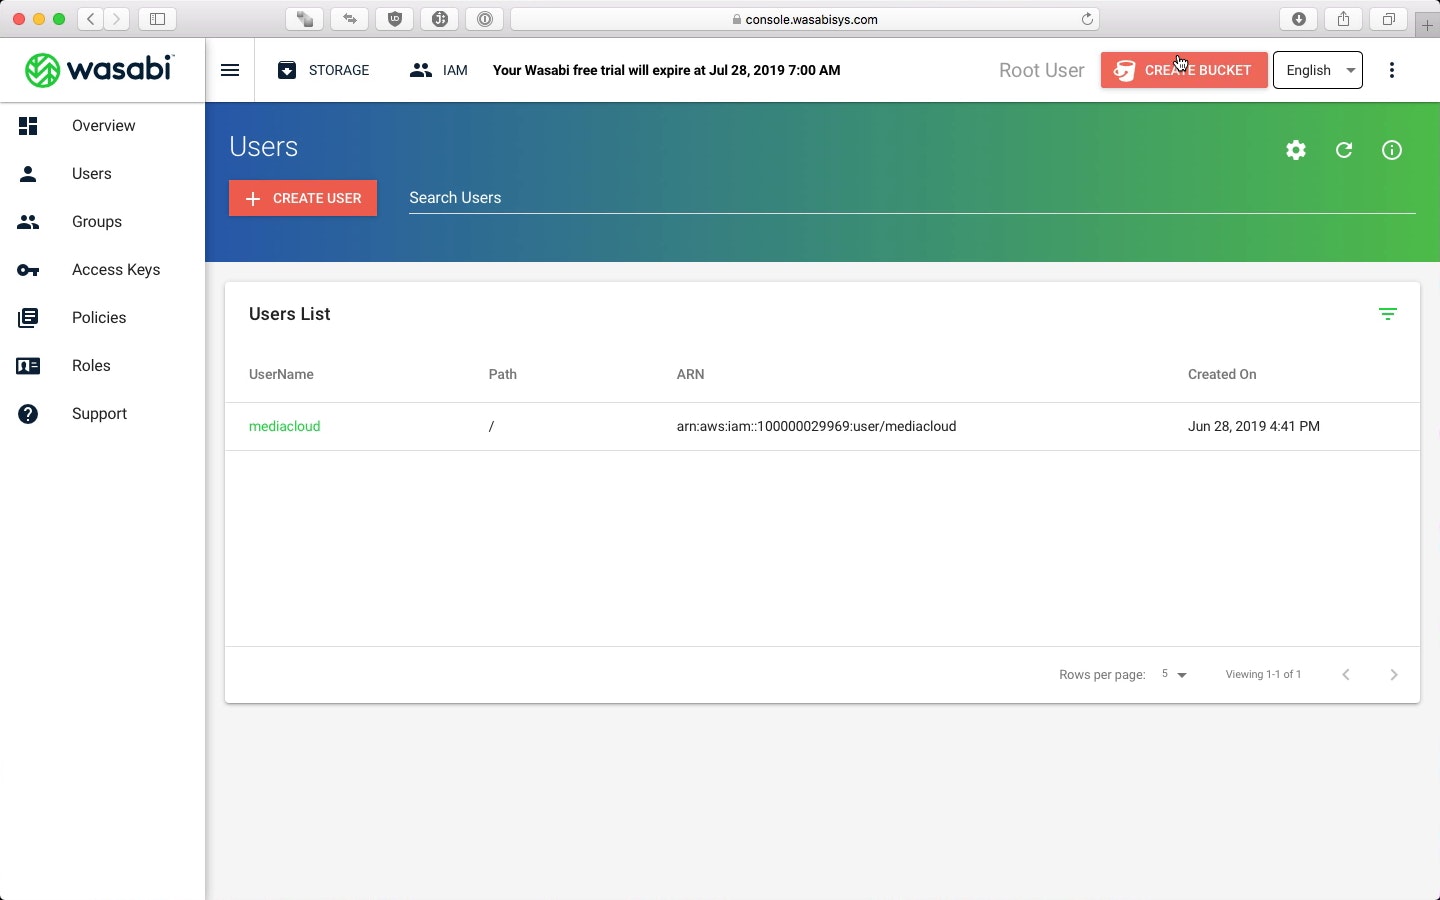
Finally, review your choices and click on Create User when everything looks OK.  Once the user is created you will be shown the Access and Secret Key. Click obn Download CSV to download these keys to your computer. Keep this file in a safe and secure place. We will be referring to this CSV file in later steps.
Step 2. Create Bucket
Once the user has been created, the next step is creating the bucket to store your media in. Click on the Create Bucket button in the upper right corner of the Wasabi console.
Step 2.1 Bucket Name and Region
In the pop up, Create Bucket, give your bucket a name and then select which region to create the bucket in. As of this writing, Wasabi only has 3 regions, so you should pick the region closest to you.
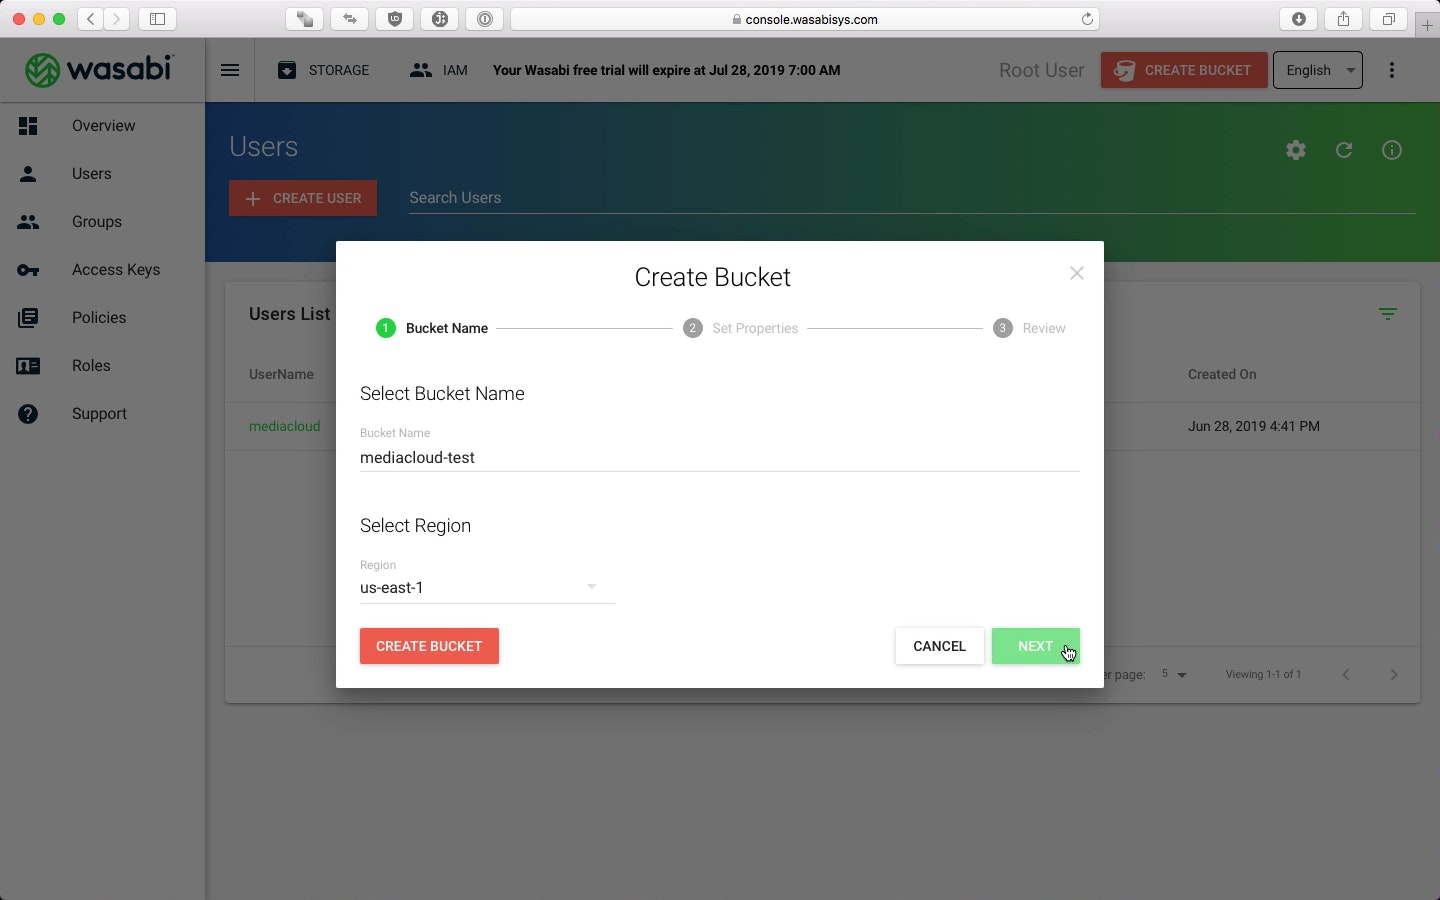
Once you’ve set the bucket name and region, click Next.
Step 2.2 Bucket Properties
These options are entirely up to you if you enable or not, they have no impact on Media Cloud or how it functions.
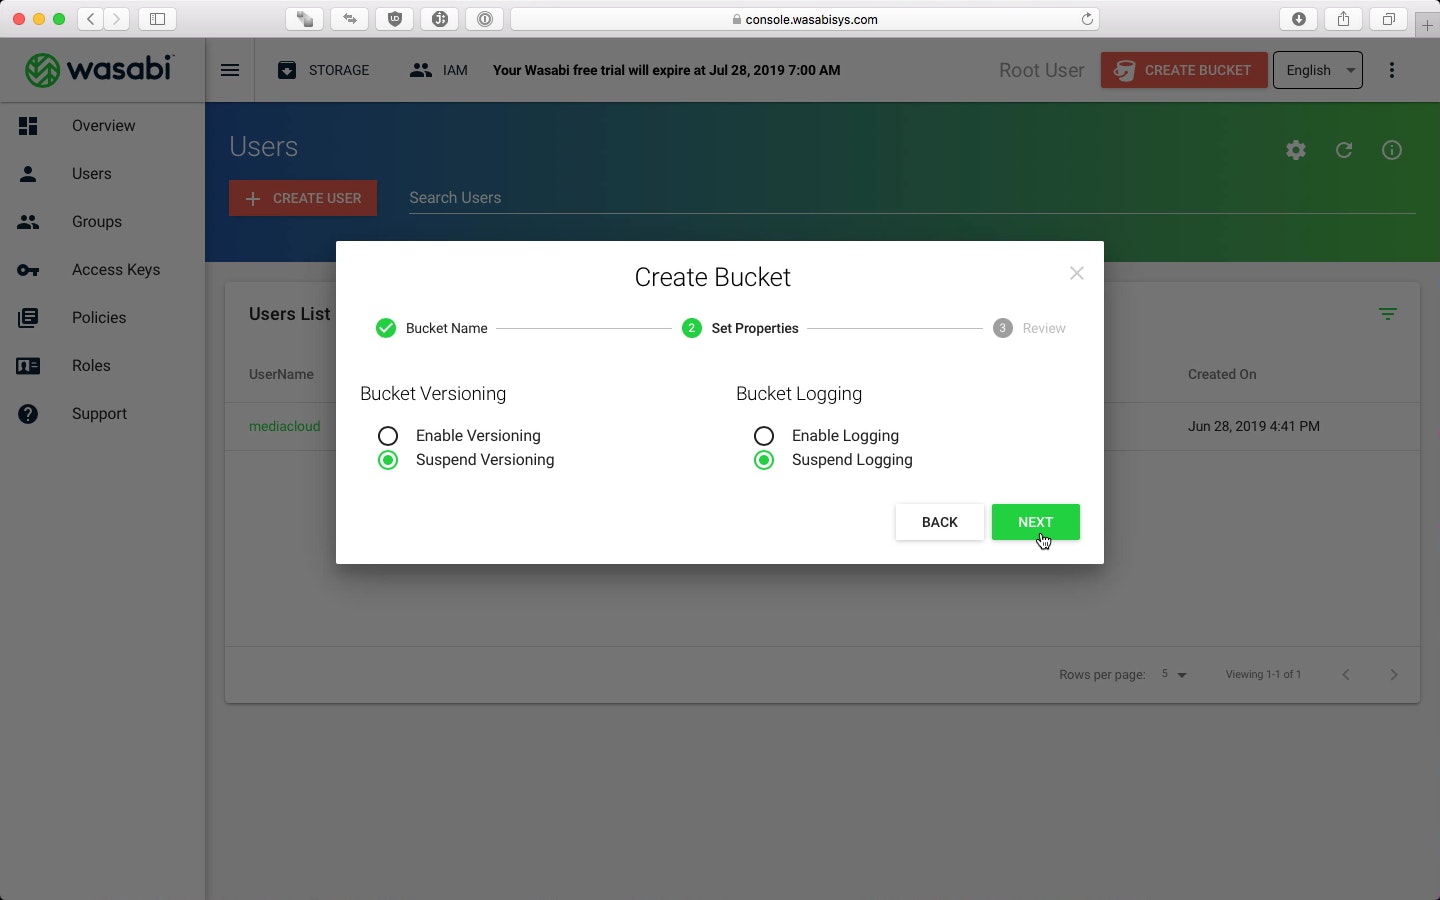
When you have this setup as you like, click on Next.
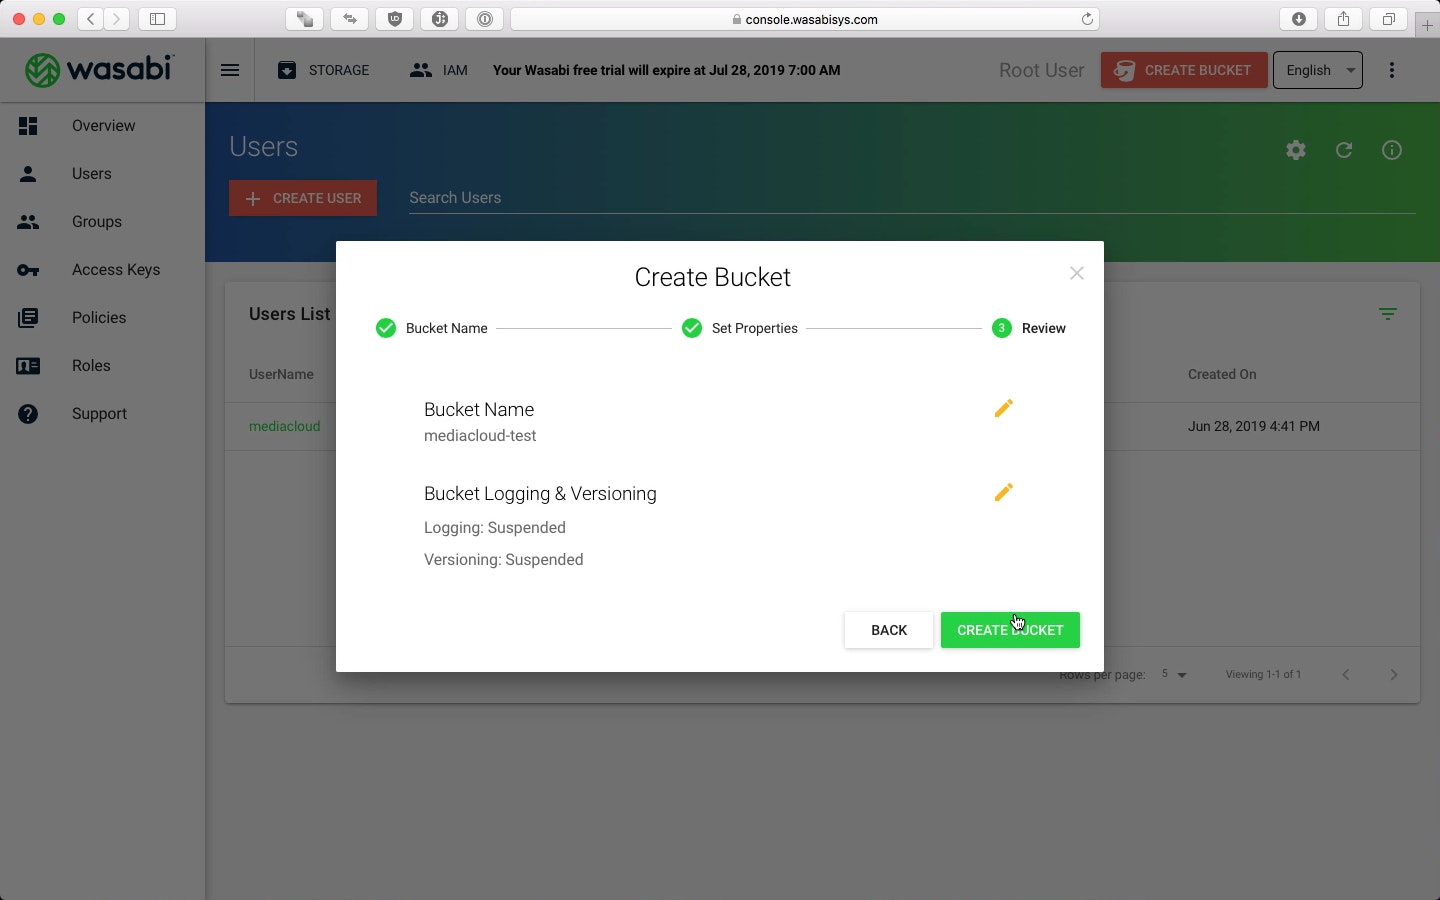
Step 2.3 Review
Review your settings and if everything is copacetic, click on Create Bucket.
At this point, you are done with the Wasabi console and should navigate back to you WordPress admin.
Step 3. Media Cloud Setup
Now that everything has been set up with Wasabi, it’s time to setup Media Cloud. Navigate to Settings in the Media Cloud admin menu and select Cloud Storage.
Step 3.1 Provider Settings
In the Storage Provider drop down, select Wasabi. Next, supply the Access Key and Secret from the CSV file we downloaded in Step 1.4. Next, set Bucket to the name of the bucket you created and for Region set this to whatever region you selected when creating the bucket. At this point, these are the basic settings you need to get Wasabi working with Media Cloud. Save the settings and run the System Compatibility Tool to verify that everything is working correctly.